


Condor is the largest flying bird on land. They have broad wings capable of soaring for a long time, perfect to monitor earth surface in search for carrion.
There are two kinds of condor: Andean and California. The one I made here is California condor, but with some head shaping change it can be made into Andean.
California condor is critically endangered. There were only 27 of them back in 1987, as many died from poaching or lead poisoning. Not because someone deliberately poison them, but rather them eating dead animals killed with guns. Extensive conservation has brought their number up to ~500 by 2020.
Design
I adore how they look like when soaring through the thermal updraft, so I want to make them in flying pose. The essential feature to be represented is the broad wings. Making the primary feathers (the one at the end of wings) as individual strand of flaps is a must, so is making secondary feathers (the one along the wings) with parallel pleats. Color change is ignored because it will be difficult to design for model with open wings.
 |
| Proportion for the wing's width and height is 2 : 1. |
There is a "cover" on top of the wings, in the shape of narrow triangle with secondary feathers coming down from it. The primary feathers would protrude from the wingtip. Both front and back sides of the wings should have this structure.
I had the idea of representing the wing cover as separate flap.
 |
| Shaded part shows the cover |
That would allow me to not worry about how to transition a clean wing cover to a pleated wing underneath. Easy way to achieve this is to start with bird base that got sunken like frog base. The layers can be rearranged so a pair of flaps are underneath the others.
 |
| Both have similar base, so I only show one folded form. |
Next we need to pleat the flap underneath. To make the wing underneath the cover remains long, the flap representing it has to be longer in the first place. How long? Whenever there is a pleat, there are 3 layers of paper there.
 |
| Area between dashes shows 3 layers of paper. |
Therefore we roughly need 3x longer flap. I realized that this is a dumb idea when I remember there is also primary feather. Those feathers will be represented as few long flaps at the end of the wings, meaning that the wing flap is a forked flap. Every strand of primary feather flap costs certain amount of paper along the flap's "stem". Pleating this stem to make secondary feathers would mean terrible efficiency and thickness. Acceptable for wings with small amount of secondary feather, but absolutely not for this subject.
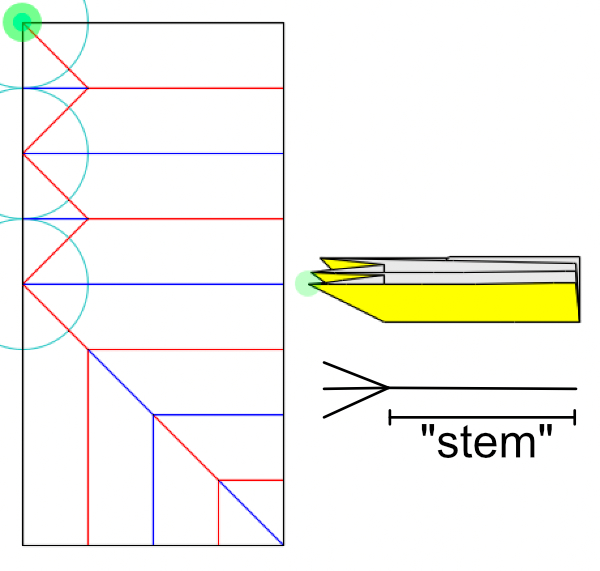 |
| Circles show the flap for primary feather. Each will add thickness to "stem". |
Pleating entire flap is now out of question. The smarter option is to make pleated structure out of 1 unit flaps like what's commonly used for insect abdomen. This can be achieved by distributing a flap into smaller ones, or just do box pleating. It is easy to zigzag the ridges to create tiny flaps with uniform length, spaced uniformly along a flap.

Since I want the secondary feather's pleat to be visible both from front and the back of the wings, that means this zigzag structure is needed on two sides.

There is now a hole in the CP. Isn't it perfect to be used for the wing cover? I think so! Until I realized that middle flap is buried inside the stick figure. There is a need for smart way to lift it up so it can be used as cover. I don't like the idea so this is ditched.
Using separated flap for wing cover as it is actually a poor way to utilize paper. When a flap length increases by certain amount, its paper requirement increases by that-amount-squared. This wing cover is essentially as long as the wings, so representing it as a flap is expensive. There has to be a smarter way....
Days later I got the idea to use level shifter. What if we have a strip of paper along the top of the wing, that is later folded down? Something like this.
 |
| The strip on top is folded down (both sides), providing cover. |
That should be easy to make in box pleating. Just need some kind of level shifters. With this idea in mind, my focus shifted on how to pack the tree. It was surprisingly tricky since the polygon to represent an entire wing is not just a square, but rather L-shaped. They are also big, causing difficulties in filling the remaining empty space. Filling empty space with filler flap is not desired.
I studied other models with secondary wing pleats. From Origami Dan, I know Mark has made many models with epic wings. Like this archangel and dove. There is no need to make two sided pleated structure, he smartly allowed the layer with pleats to be visible from both sides. My packing is made easier with this observation, but I still can't get a tightly fitted packing.
Days passed and I decided to restart this model. I stared at a folded form of fish base, and imagined how can it be turned into a condor. Kind of like how bird base become Ancient Dragon. Fish base seems to be the perfect basic form. The two long flaps become wings, and two shorter flaps become head and tail.
 |
| Right side shows the stick figure. |
To make secondary feather's pleat, a flap can be snugged underneath the long flap of the fish base and later distributed into smaller pleats. The question is how to transition it.
 |
| Shaded circle is the flap to be distributed into pleats. |
Apparently this can be achieved by adding a strip graft along the diagonal. The extra flaps that are not going to be distributed will be used for primary feathers.

Fish base is based on 22.5 so I made the graft reference to be based on 22.5 as well. I choose silver rectangle as it fits very nicely. The flap that will be distributed has equal length with its distance towards the wing's starting point, meaning that it can be perfectly distributed along that part.
 |
| Common choice of graft width for 22.5 model. Left: \(2 : 1 + \sqrt{2}\) Center: \(1 : \sqrt{2}\), also known as silver rectangle Right: \(1 : 1 + \sqrt{2}\), also known as \(\tan{22.5^\circ}\) |
Actually the flap to be distributed is too pointy. I added another strip graft but this time along the border to make it wider. There are extra paper for primary feather and tail area.

I did a test fold as a proof of concept, and it worked well. The wing cover problem is solved by folding down the fish base's highest point from its axis. I substituted the half bird base section for primary feather into pleats to host more but smaller flaps.

Wings are set. Now I can think about the head, tail, and legs. Head is pretty straightforward, I should be able to improvise shaping on a corner flap easily. Tail and legs would be more challenging. What's available is a small 22.5 flap extended with large amount of pleats. My simple mind instructed me to just do point splitting there, extend the length by redirecting the graft direction diagonally. Just like my helmeted hornbill's legs. This works, but there won't be enough paper to make the fan-like tail.
If making legs first then tail doesn't work, then what about the reverse? I could use this small 22.5 flap for tail, and use whatever remaining for legs. This gave me the idea of redirecting the pleats diagonally, and then do box pleating to make legs. There is even enough space to get 3 toes.
 |
| Rough sketch for tail and leg allocation. |
 |
| The rough test fold, showing tail and legs. |
Actually we can easily get 4 toes, by doing spread squashes so the leg tips are in 22.5. Once we have 22.5 edge flap, there is a well known method to split it into 4 smaller flaps.
 |
| Area with circles resembles half frog base. |
Condor's middle finger is longer than the others. We can spice things up a bit by substituting the half frog base into two little bird bases that are sunk.

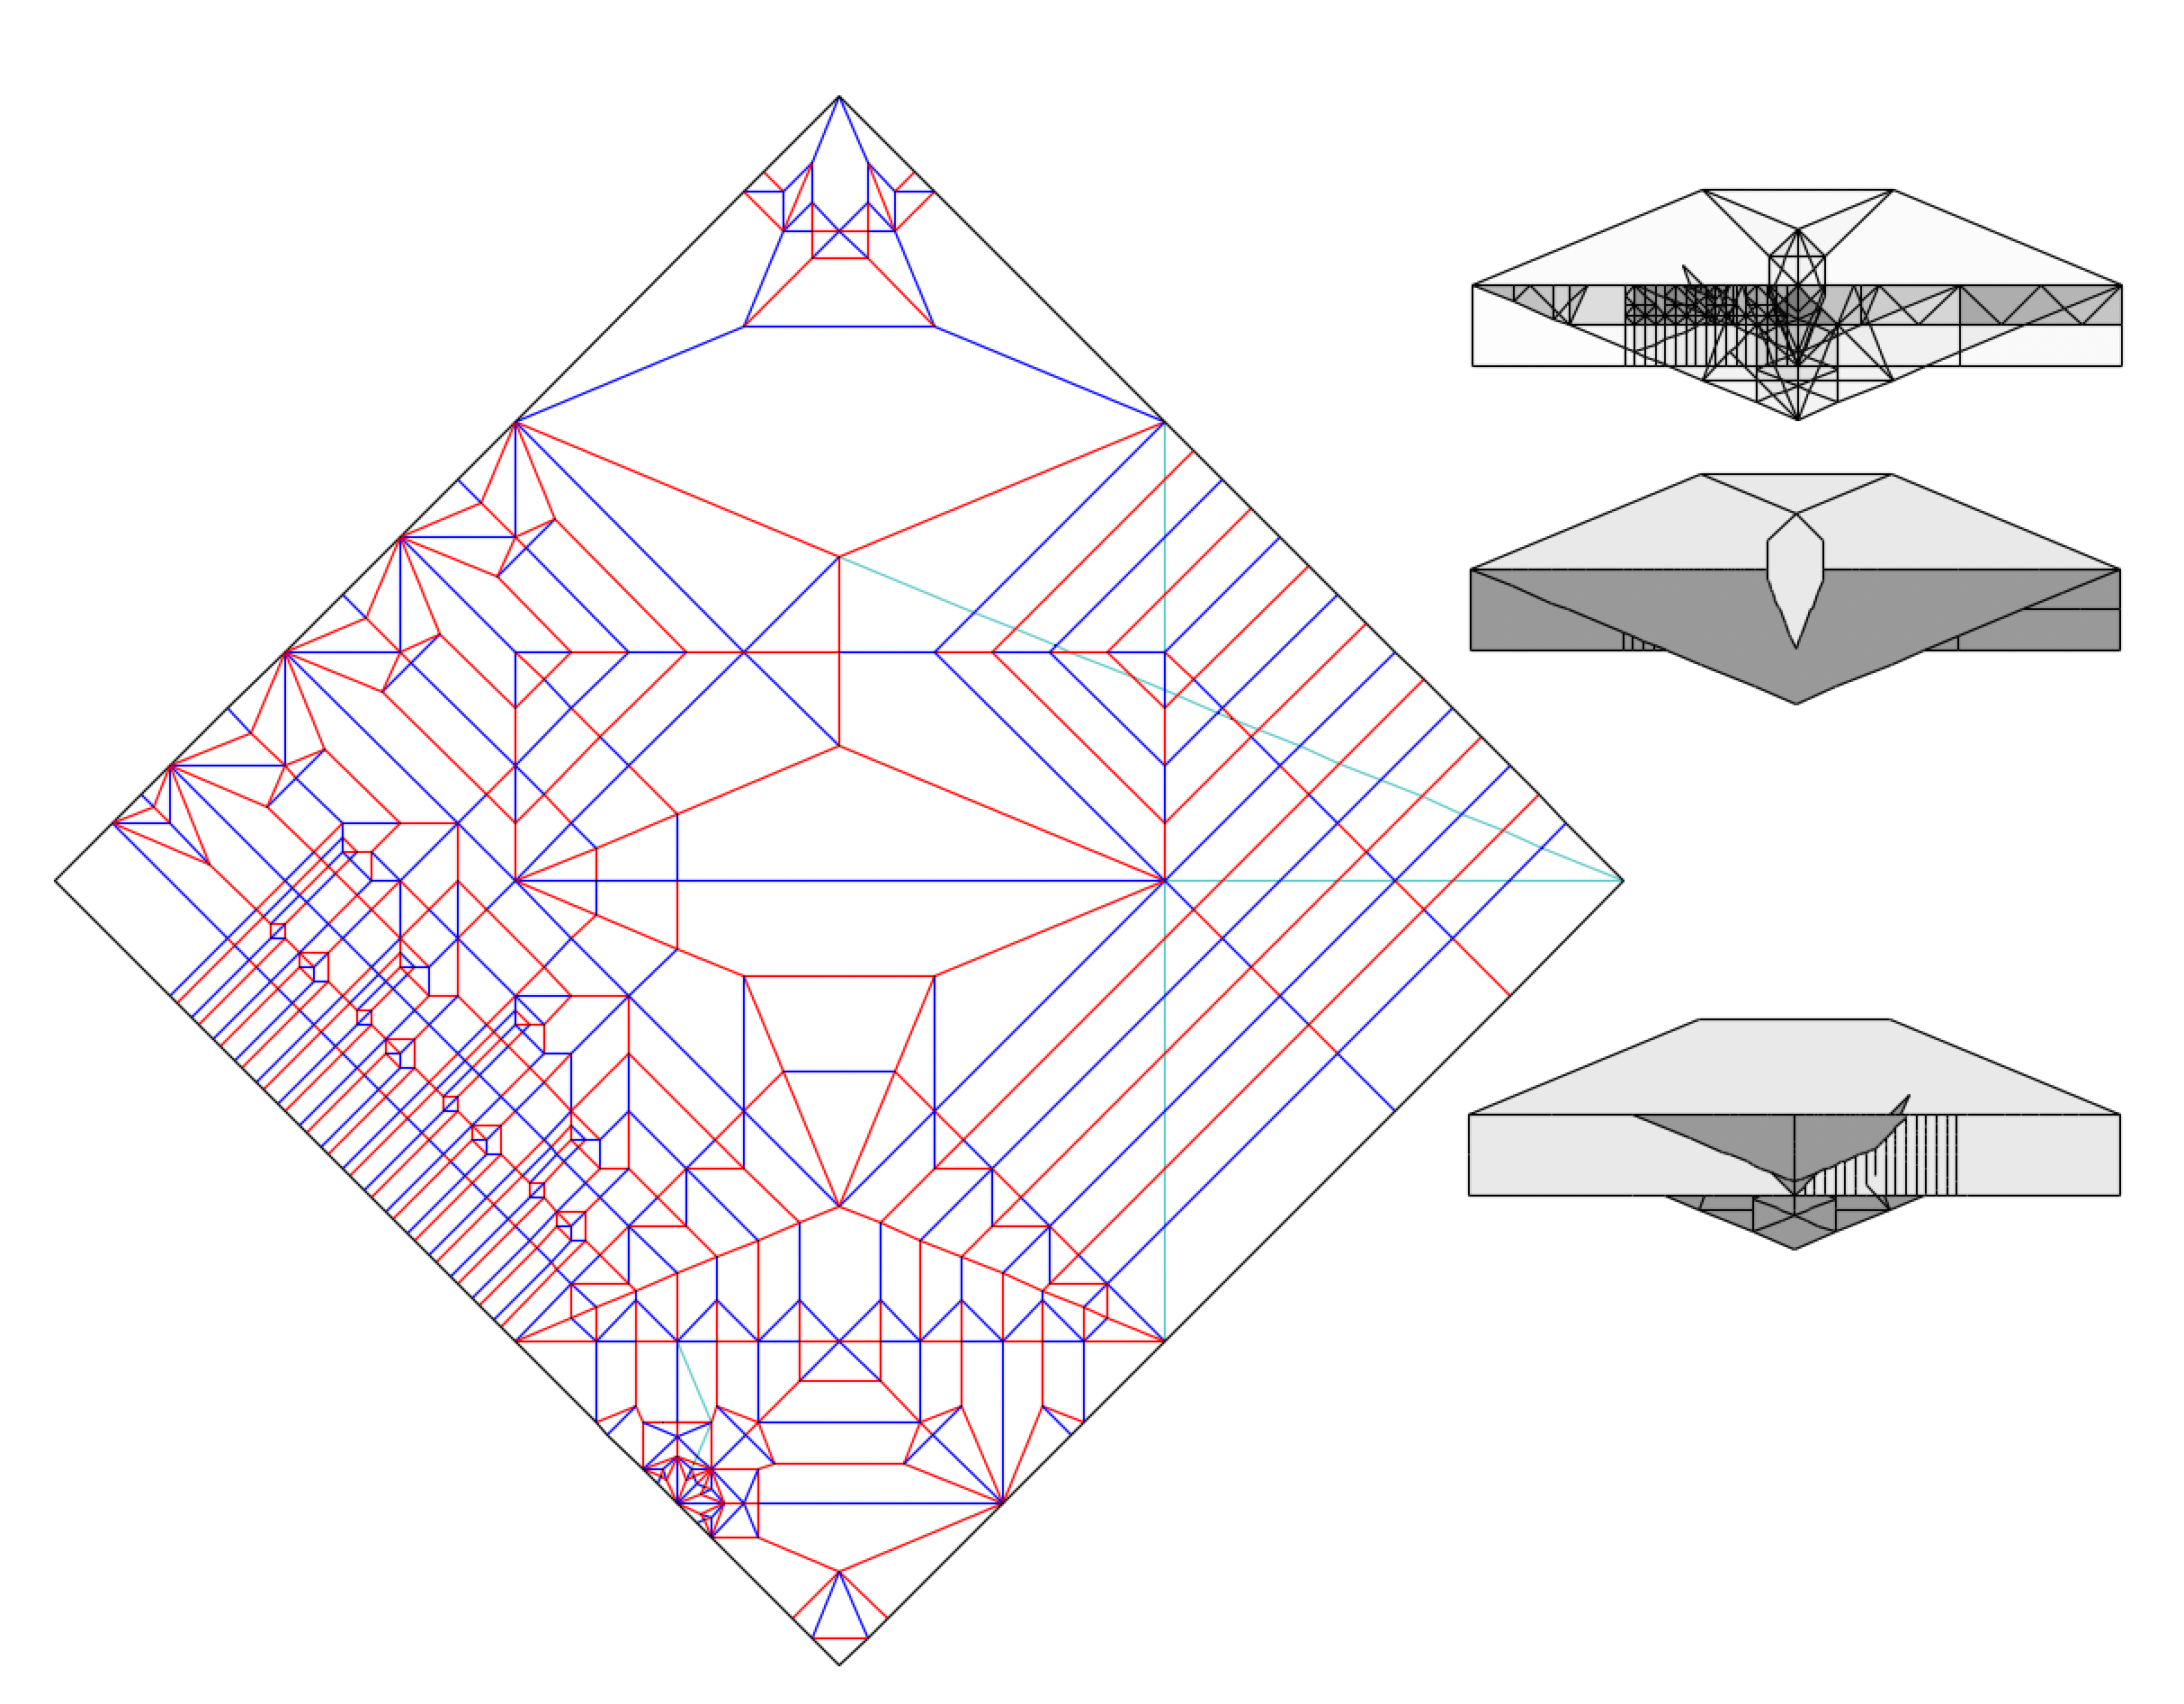
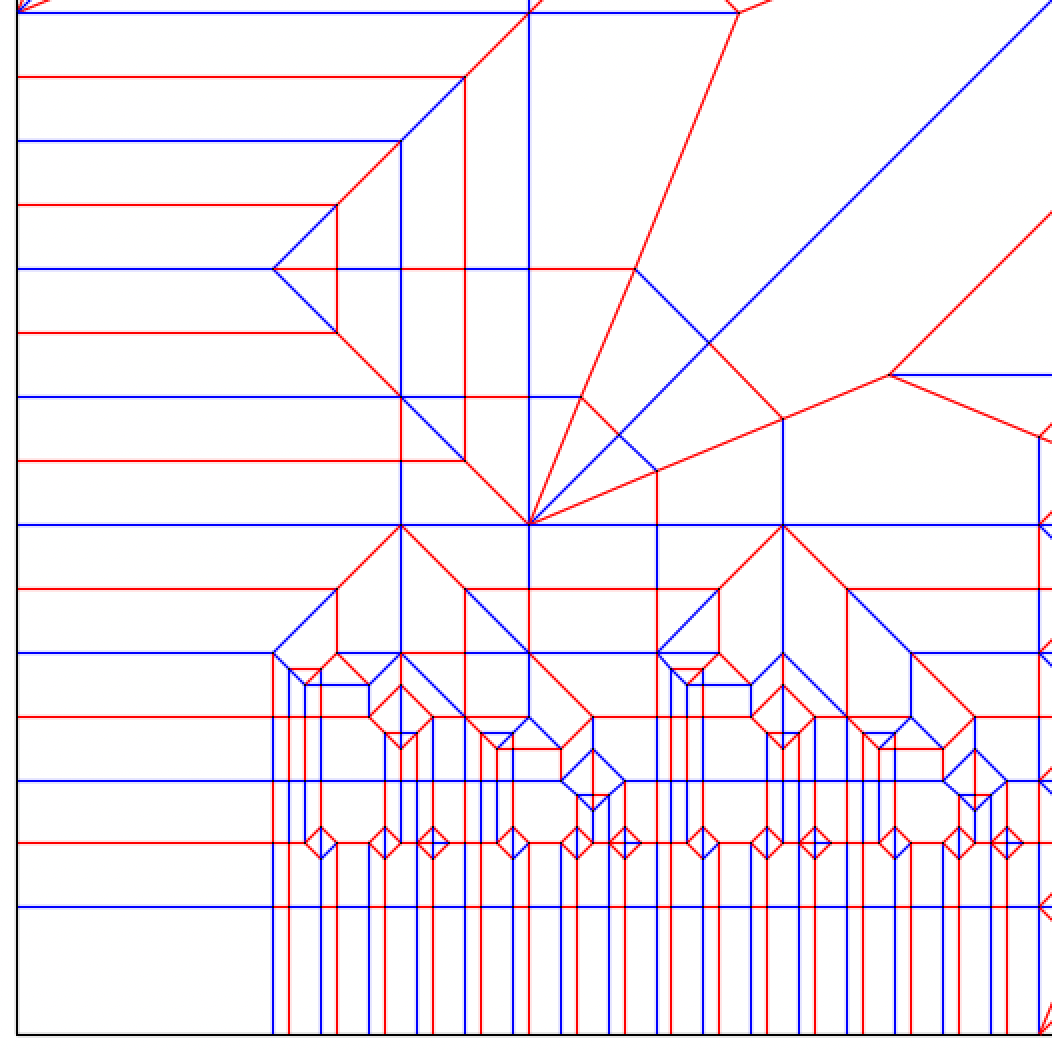
With all these promising development, it is time to do more serious test fold. I planned out the wing pleats with box pleated style. The one unit flap is split into 16 flaps, with uniform size and spaced uniformly. Looks ugly but it is easy to fold.
 |
| My initial solution. |
Bodo and Fish showed me a neater way to make the pleats. In the end I adopted parts of Fish's solution to balance the ease of folding and simplicity.
 |
| Fish's solution. |
I made some more serious test folds. The wings got thick, though in my defense it is to be expected given how many features they carry. The tail part shaped by first making the 2 layers stick to each other using closed sink. Then fanning it out becomes easy. The head part's shaping is just improvised 22.5 folding. I found some triangles are more attractive than just rectangular pleats.

Even with point splitting for toes, the legs are still quite long. Which is good since it gives larger degree of shaping potency. For example I can shape with legs extended as if the bird is landing on dead body.
Fold
I prepared 60 cm Thai unryu for this model. The thickness is between single and double tissue so it should be perfect. However I was still unconfident to do the final fold and the Origami Dan design contest (theme: bird) was due in 5 days. Therefore I decided to do a final serious test fold that will be fully shaped, as submission for the design contest. Then I can do the final fold with unryu at my own pace.
The test fold uses 50 cm alios kraft. The paper is thin and crisp, but is bad at handling water as any parts touching MC become uncontrollably wrinkled. Still I think it is worthy of contest submission.
 |
| (supposedly) landing pose since folks in origami dan love dynamic pose. |
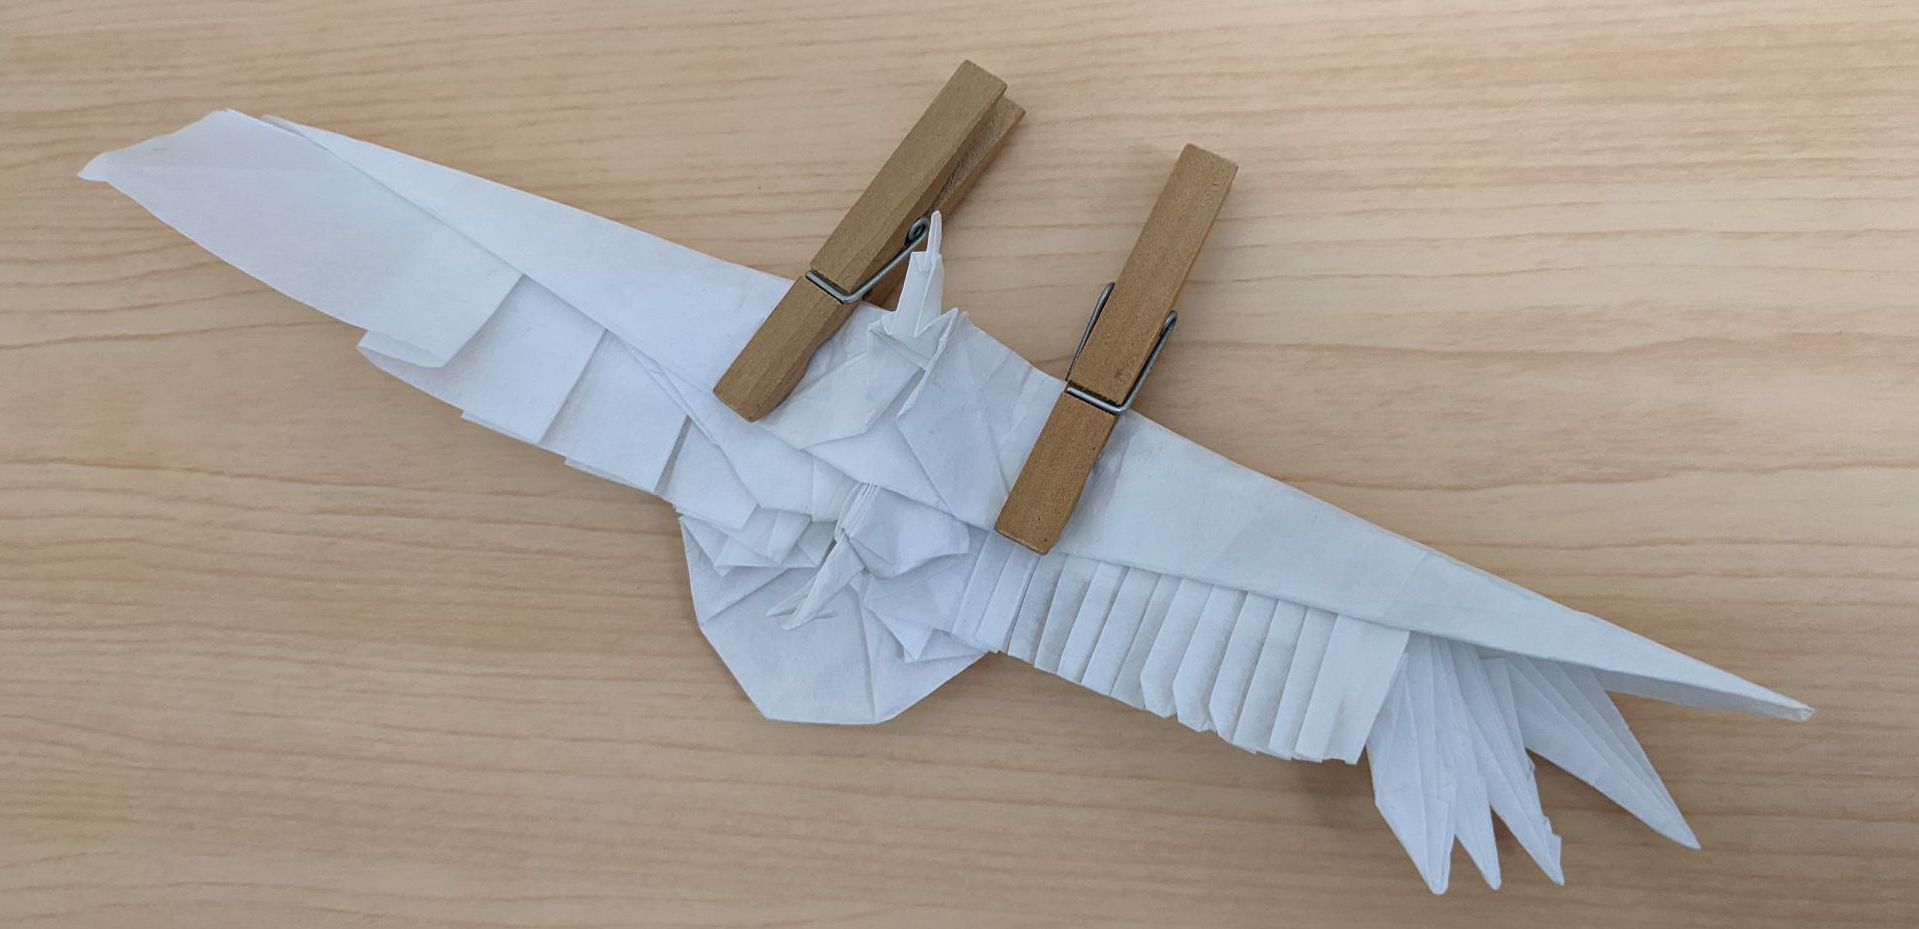
The final fold was finished weeks later, with soaring pose. People might find this pose boring, but I personally like it as my objective is to portray the broad wings riding on thermal updraft. Below are some progress picture.
 |
| Biggest paper I have ever folded so far. |
 |
| Precreasing pleat. |
 |
| Basic base. |
 |
| The inner layers. |
 |
| Before final shaping. |
Remarks
To my surprise I won the design contest :')

In reality, condor may have uneven and broken wing feathers. I have an idea to represent that by structurally shorten some primary feather and make some big reverse folds on the secondary feather, but I'm not that confident to purposely introduce imperfection. At least now I have made one with perfect feathers, the next one would have built-in imperfection.
 |
| AP Photo/Marcio Jose Sanchez. Source: https://ktla.com |
Comments
Post a Comment