


This is the second version of my origami frigatebird. I made one before for Origami Dan's November design contest, whose theme was "aerial". The first version looks like this:

 |
| Top quarter of the paper is folded underneath. Why? Keep reading. |
Since the topic was "aerial", I wanted to make this bird in flying pose. Something like what we as human will see from the ground. The air sac of course has to be color changed, and it isn't hard to do. However by introducing color change in a bird model with open wings, the wings will be tricky.
In bird origami with wings spread out, typically the feathers are made by pleating. Lots of individual pleats are expensive as it consumes large amount of paper. Therefore the most natural solution is to use corner or edge of the paper. Problem occurs when we're using duo colored paper; when the pleats in the paper edge are spread out like fan, the other color of the paper will be exposed underneath of the wings. Take a look at my greater bird of paradise's wing.
 |
| The underside of the wing is yellow. It is supposed to be the same color as the upper side. |
This "color leak" is undesirable. I tried to find existing flying bird model with color change to study how this problem is solved, and I failed to find any example (if you know one please let me know). Therefore on my first version, I folded a quarter of the paper behind before folding the model to cover the pleat area that will be exposed once it is spread. In the case of greater bird of paradise, I just went with the color leak because wings are not the model's main feature.
My first frigatebird still haunt me for months to come. The model was terribly designed because:
- A quarter of the paper is wasted.
- The top quarter paper is folded behind and it gets into the tail flap, making the tail flaps extremely thick. One of the flap is even 50% thicker than normal middle flap.
- The two forked tail flaps stack on top of each other, it looks ugly.
Definitely this model needs rework.
Design
This bird has many triangular feature. This inspired me to approach it with 22.5 method.
The initial plan is to use diagonal symmetry so the wings can utilize the opposite corners and be as long as possible. Considerable wing's length will be lost once I pleated them to make feathers. So there goes two corners. One corner is reserved for color changed air sac, so that leaves me another corner for the second longest flaps to allocate: the forked tail. The bird's head will use middle flap. So the basic point arrangement would be:

If I squint my eyes really hard, I can see a good old bird base with a point split. I have used this structure far too many times and frankly, it bores me. Anyway this structure is simple and efficient, so there's no reason to ditch it.

I want to add some details in the head, like distinction between upper/lower beak, and eyes. To do this, I added a diagonal graft and make 3 middle flaps; two for beak and one for eyes. I realized that if I inside reverse fold the graft's ending on the edge of paper, a somewhat feather-like structure will appear. This unintentional discovery fits my use case; to make wing feather without color leak.
 |
| Lower left corner shows the feather structure. It is shown in the right side of the left folded model. |
Regarding the air sac, swiveling the flap works great to expose the underneath of the paper.

I did a test fold for this base. On the air sac part, I found out that I can make the transitional texture as seen on the reference below:
 |
| See the dots at the border of the air sac? That's what I wanted to express. Picture source: https://everywherewild.com/ |
This is done by squashing the edge, then do sink in and out there. The result is jagged color changed border. It is not dots, but close enough I guess.

Things were looking great at that moment. However the head has some issues. The beak is not long enough, so I will have to sacrifice the lower beak. Instead of having 3 middle flaps, it will be just 2 middle flaps but longer. This reduced the amount of pleat for feathers. To compensate the lost I doubled the amount of pleats for wing feathers by pivoting on hinge. It is something I learned when designing my other bird of paradise model.

Well the base looks great. Later I made a test fold on 35 cm foil paper. I hate this paper and test fold is perfect opportunity to get rid of them. While I have a workable base, shaping is difficult because the flaps for the bird's head and body are wide. I need to somehow narrow it down, and found a way to bisect the angles then sink it. All is well on the body and tail area.
Narrowing the beak and air sac area is difficult so I reworked that area. To get narrow beak, the beak flap has to be fully composed of 22.5 angles, without any 45 as what the last version had. This is easy to do with Y molecule. However the somewhat cool structure for jagged color change must be forfeited.
 |
| The CP looks complicated because there are repeated sinks. |
I fiddled around using the test fold and found a way to salvage it. I can open and squash the tip to expose two straight edges that I am so fond of. Why? Because this structure can accommodate sink in and out nicely.

Finally a desirable base is finished. During a yet another test fold I realized that the corner of the paper near tail can be split to make stubby feet. Indeed this bird has small feet that are hard to see when it is flying. Also I repurposed the flap for eyes into back. This model's body will be 3 dimensional and I need to close the back. The next challenge would be shaping.
Having folded many models from diagram, I seek a series of shaping steps that is made by concrete folding steps like theirs. There are just 3 parts that I need to shape: head, tail, and air sac. The beak is easily made by pleating and narrowing the tip. The tail has feathers by pleating one of the flap's edge. The air sac... was not straightforward. By the time I found a workable solution, the foil has disintegrated.
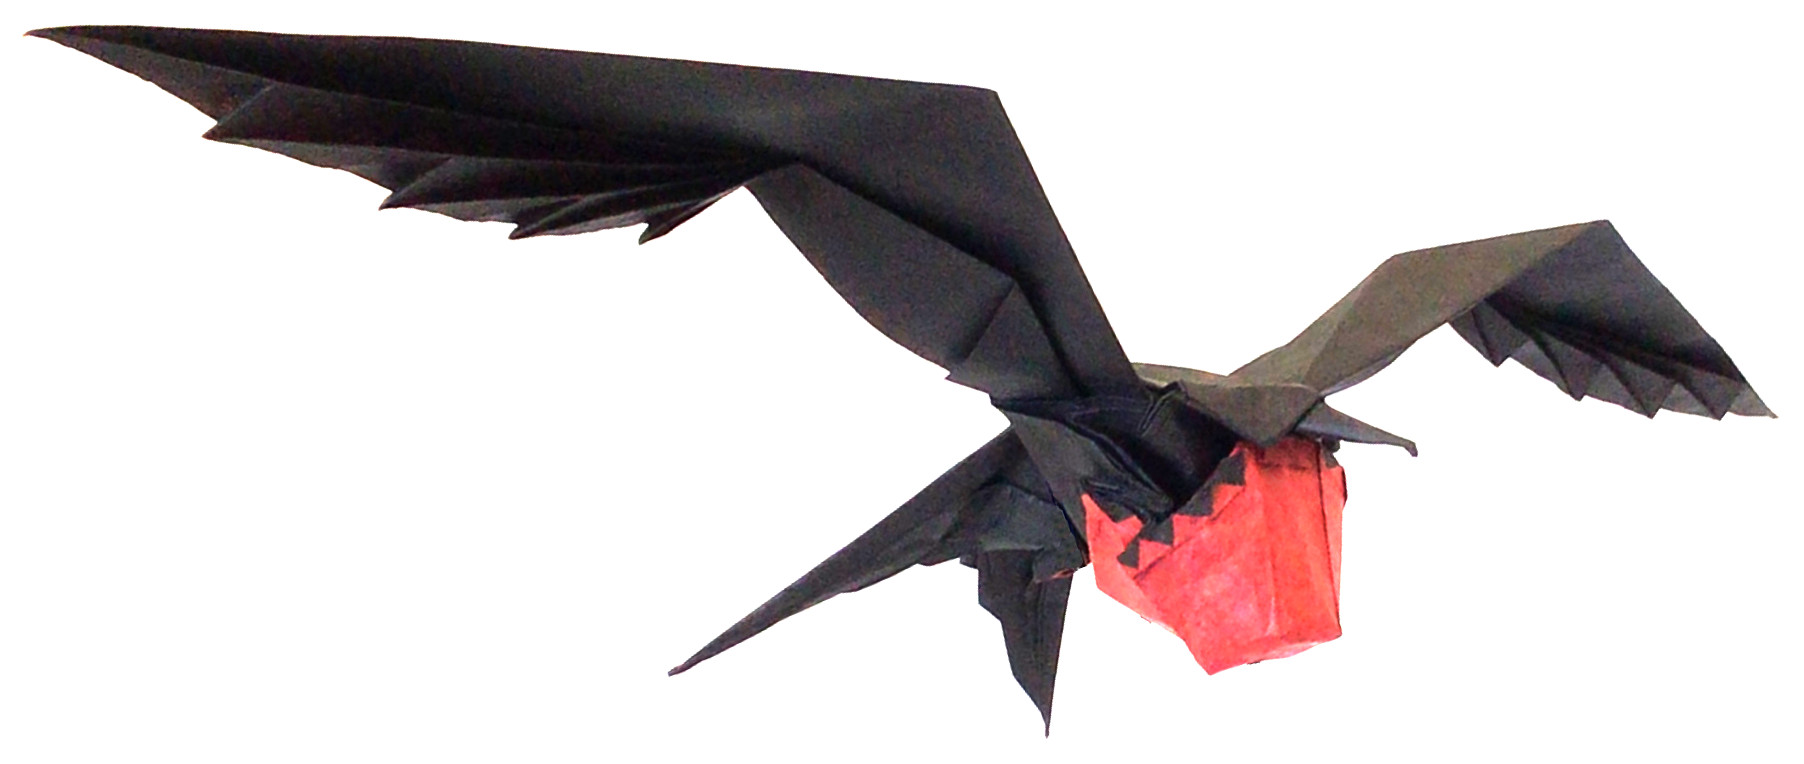
Fold
I prepared 35 cm double tissue for this. Botched it on first try because of miscalculation on the air sac and wings. I took my time on second try to get it done. I am happy with the result and finally would no longer get haunted by frigatebird v1.0.
 |
| The base |
 |
| Shaping in progress. |
 |
| Another shaping in progress. |
 |
| Air sac. |
 |
| The test folds. |
This model is optimized to be seen from front bottom side. Here's how it looks like from back.

Comments
Post a Comment